Backups - how do I do a site backup?
NOTE: A full backup of your Zen Cart site has TWO steps:
- A copy of all your Zen Cart files, and
- A copy of your database
Step 1: Backup your files
A) If your site has cPanel:
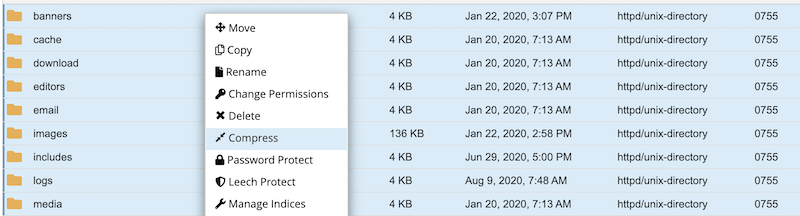
- open cPanel, and open File Manager. Drill down to your site. If your site is at the top level of your hosting account, this will likely be right under
public_html. Select all files and right click, and choose “Compress.” This will create a Zip file when the operation completes. Select that file, right click and choose “Download.” Once the Download completes, remove the zip file from your server; you don’t want it lying around there.
B) If your site does not have cPanel:
- Use your FTP tool to make a copy of all the files on your website, by copying them from your webserver to a folder on your business computer.
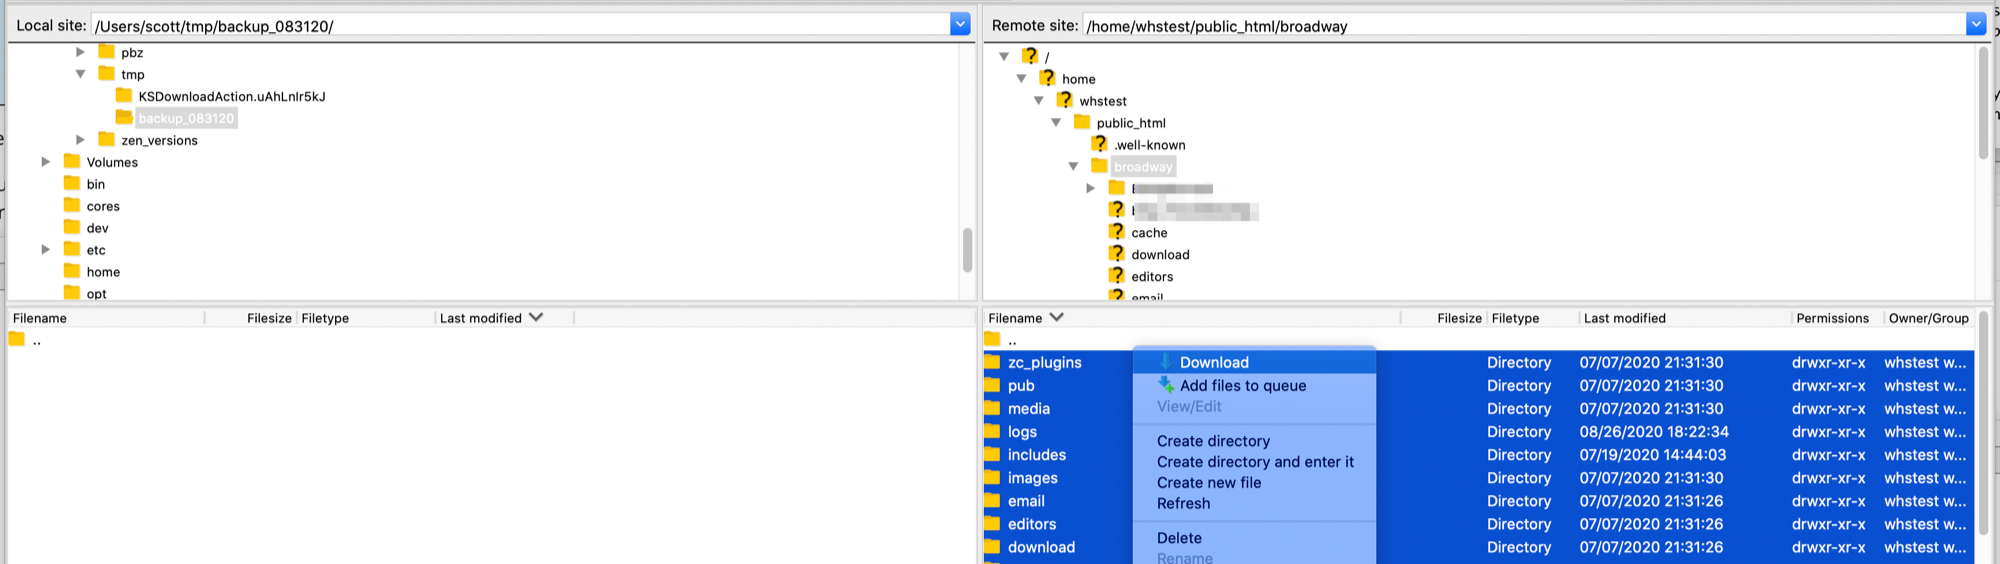
When you save files to your computer, the directory/folder on your computer should be named by today’s date so that you can distinguish between backups.
Having this gives you not only an up-to-date set of files on your server, but also a reference point for either making changes or for making comparisons in case something gets compromised or damaged on your webserver. You can either use this set of files to restore the program back to your website, or to diagnose a problem if one occurs.
NOTE: Keeping multiple separate versions on your computer is prudent, in case something is changed unexpectedly or accidentally. So, archiving these downloaded files is wise, to a USB key or cloud based backup.
STEP 2: Backup your Database
A) Using phpMyAdmin
1. Open phpMyAdmin
2. Select your database from the dropdown (usually on the left side), so that its tables are displayed (they usually display on the right side).
3. Click on the Export tab. NOTE: Be sure you’ve already selected your database from the pulldown BEFORE clicking on the Export tab
4. Many of the default settings are fine; however, choosing the “Custom” export type will allow you to optimize your backup. Generally the default settings are correct, but just in case: (“tick” here means “tick the checkbox” or “select the option”):
- Tick “Save output to a file”
- UNTICK “CREATE DATABASE / USE statement”
- Tick “Add DROP TABLE”
- Tick “AUTO_INCREMENT value”
- Tick “Enclose table and column names with backquotes”
- Tick “Complete Inserts” (helpful during upgrades if you have many custom fields added by modifications made to your site)
- Tick “Extended Inserts” to help keep the file smaller, especially if you are just making backups for safekeeping and not for troubleshooting something.
5. Click Go to do the export. It will give you the option to save the file to your PC. BE SURE TO SAVE IT to an appropriate spot on your PC. To have a redundant backup, save a copy to a thumb drive or upload it to a cloud account such as Google Drive.

B) Using cPanel Backup
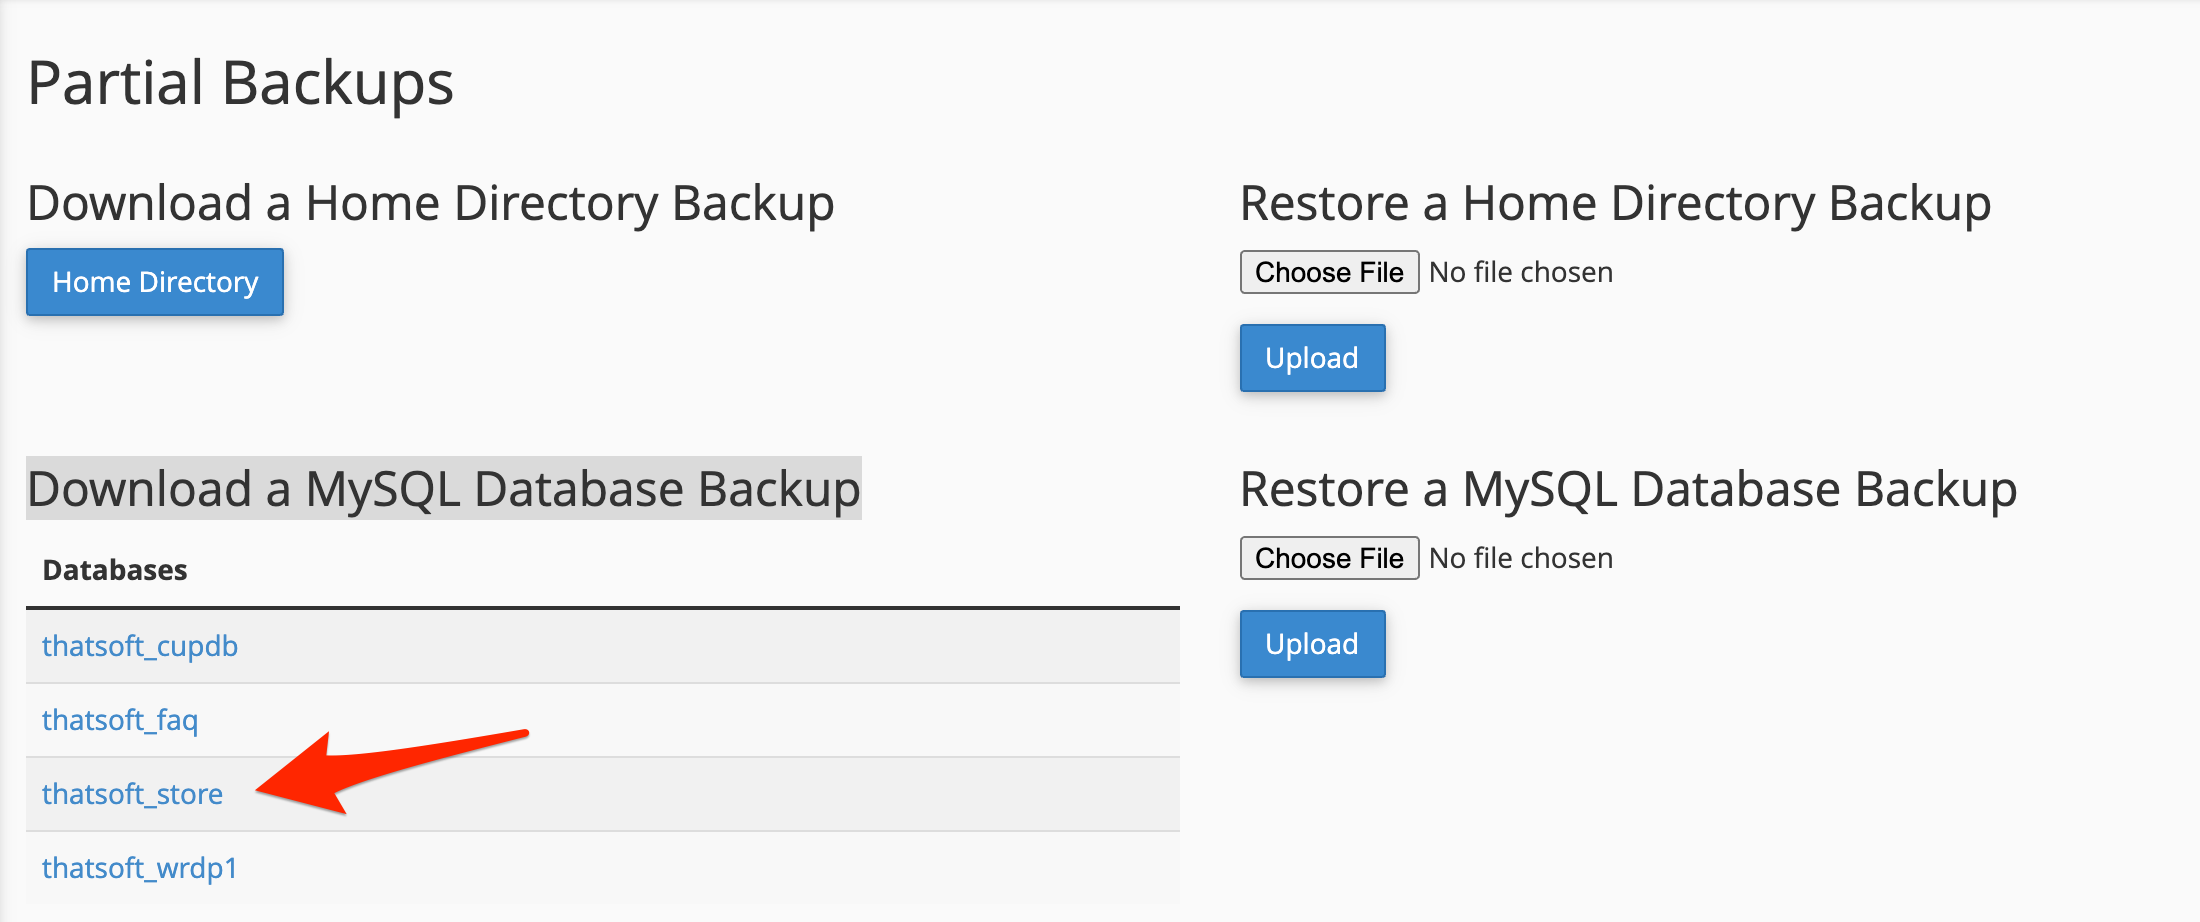
If your cPanel has a “Backup” utility, scroll down to “Download a MySQL Database Backup” and click the link corresponding to your database. This will download a compressed database backup.
C) Using the Backup MySQL Plugin
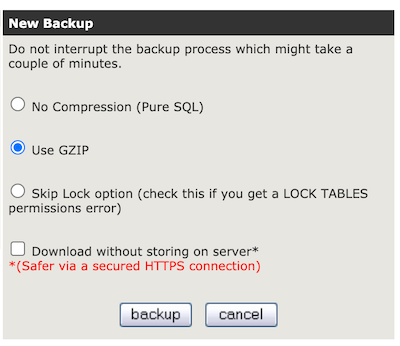
On hosts that permit the use of exec(), you can use the
Backup MySQL Plugin
to create your database backup, and then download the resultant file
from YOURADMIN/backups to your local computer. Again, you will
want to save a copy to a thumb drive or upload your backup to a cloud account so that you have
redundancy.
Setting up your cart on your own computer
Now that you have a fresh copy of your database and files, it’s the ideal time to create a local development environment.
Restoring a Database
- Open phpMyAdmin
- From the dropdown menu, select the database you wish to restore INTO
- Click on the “Import” tab (in older phpMyAdmin versions, you might have to click the “SQL” tab instead)
- Click on the Browse button, and select the file you downloaded when making the backup
- You probably want to UNCHECK the “Allow interrupt of import” in the Partial Import section.
- Click Go
NOTE: If you are going to be RESTORING to a server running different version of MySQL than what your backup came from, you should be careful about which additional switches you check. Ask your hosting company or server administrator for guidance if you are uncertain.