How do I enable SSL after I have installed Zen Cart?
See also Basic Hosting and Domain concepts.
SSL (secure socket layer) is used to encrypt communications between the browser and the server, thus protecting sensitive data being transferred from your customers to your store. You will recognize SSL mode by seeing the familiar https:// in the URL in your browser’s address bar. This should always also be accompanied by a secure padlock symbol in your browser, often in the address bar with the URL or in the status bar at the bottom of the browser window.
Note: Some hosters offer to “help you” make your site secure. Unless they are Zen Cart specialists, be wary, because they will likely not do step 3 below, which will lead you into a world of pain!
1. Purchase your SSL certificate
You will need to arrange with your hosting company to have SSL capability added to your hosting account.
- URL looks like:
https://www.YOURSITE.com - requires purchase of an SSL certificate, at an annual fee ranging from $20 to $900 per year. You do NOT need the most expensive one for simple secure SSL use on your site; from a technical perspective, a low cost certificate is just as secure as the more expensive one. The certificate is usually installed by your hosting company. You can purchase one yourself or have your hosting company purchase it for you.
- when you purchase the certificate, decide FIRST whether you want your SSL URL to include the
wwwprefix or not. Ideally ask the certificate company to allow you to use BOTH. They can do that, usually at no extra charge.
IMPORTANT NOTE ABOUT SSL AND ZEN CART:
It is important that your hosting company’s servers be configured to serve both SSL and non-SSL content from the SAME folder on the SAME server. Attempting to use a hosting service whose SSL service is on a separate server or points to a separate folder will result in numerous operational problems, and possibly very complicated maintenance problems.
The hosting company should allow the $_SERVER variable values to be set via traditional means (ie: ‘SSL=on’ or ‘SERVER_PORT=443’ or ‘HTTPS=1’, etc). If they can’t do that, then Zen Cart may have challenges switching into SSL mode automatically. Most good reputable hosting companies already do this. Those who don’t should generally be avoided.
2. Make sure SSL is working
FIRST, make sure you’ve got SSL enabled on your hosting account. Work with your hosting company to get a certificate installed and to purchase one if necessary. As mentioned above, IT IS RECOMMENDED THAT YOU REGISTER IT TO YOUR www address, such as www.YOURSITE.com (and not just “YOURSITE.com”), or alias it to both URL forms.
- Can you get to
https://www.YOURSITE.com? - If not, ask your hosting company how to do it.
- If you can’t access your site using an
https://address, don’t try to enable SSL in Zen Cart or you’ll just end up with broken pages in your store!!! Get the SSL working first before you enable it in your store.
3. Enable SSL support in Zen Cart
Once you’ve had your hosting company install your SSL certificate, and you have confirmed that going to https://www.YOURSITE.com actually works without an error, you can turn on SSL support in Zen Cart using the following information:
- You will need to make changes in both the
/includes/configure.phpand/YOURADMIN/includes/configure.php.
Change includes/configure.php to:
define('HTTP_SERVER', 'https://www.YOURSITE.com');
define('HTTPS_SERVER', 'https://www.YOURSITE.com');  // In older Zen Carts only
define('ENABLE_SSL', 'true');
Change YOURADMIN/includes/configure.php to:
define('HTTP_SERVER', 'https://www.YOURSITE.com');
...
define('HTTP_CATALOG_SERVER', 'https://www.YOURSITE.com');
define('HTTPS_CATALOG_SERVER', 'https://www.YOURSITE.com');
...
define('ENABLE_SSL_CATALOG', 'true');
Modern versions of Zen Cart
(1.5.5 and above)
do not have HTTPS_SERVER in the
YOURADMIN/includes/configure.php file.
IMPORTANT NOTE: Remember, your configure.php files are probably marked read-only. You’ll need to change them to read-write in order to upload your updates, and then put them back to read-only. See the FAQ on setting file permissions.
4. Clear your browser’s cache and cookies
After making these changes, if you don’t clear your browser’s cache and cookies, it’s possible that your logins will not work because the browser is remembering information from the old URL. A simple clearing of the cache and cookies, and sometimes a restart of the browser application, is all it takes.
5. Your site is now secure!
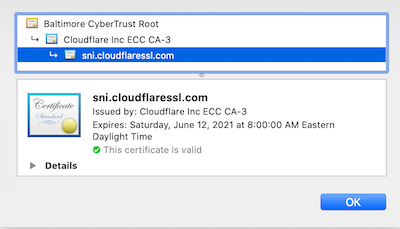
Once your done, your browser’s address bar will show a non-broken padlock like this:

and if you click on your SSL certificate, you’ll see it’s valid, like this:
You will want to keep checking your SSL certificate as part of your regular website maintenance so that you don’t get a broken padlock.